

Ah, Pinterest. You make everything seem so easy, with your photos of impeccable dishes, crafts, and other DIY activities that inspire us to do crazy things, like make our own candy. Yes, why take the easy way out this Halloween by going to Costco and buying the jumbo bag of candy when you can make a huge mess, burn your thumb in melted caramel, and leave chocolate fingerprints all over the house?
Answer: Because the results are pretty darn tasty, though not picture-perfect.
A year after pinning a King Arthur Flour recipe for “Thousand Dollars Bars” (aka Twix bars — my favorite candy), I decided to actually try the recipe. Halloween offers the perfect excuse, and though I had no illusion that I would make enough candy to hand out to all our trick-or-treaters, at least my family and co-workers could enjoy them. The recipe didn’t seem too difficult — just time-consuming — so I gave myself two days and lots of counter space.
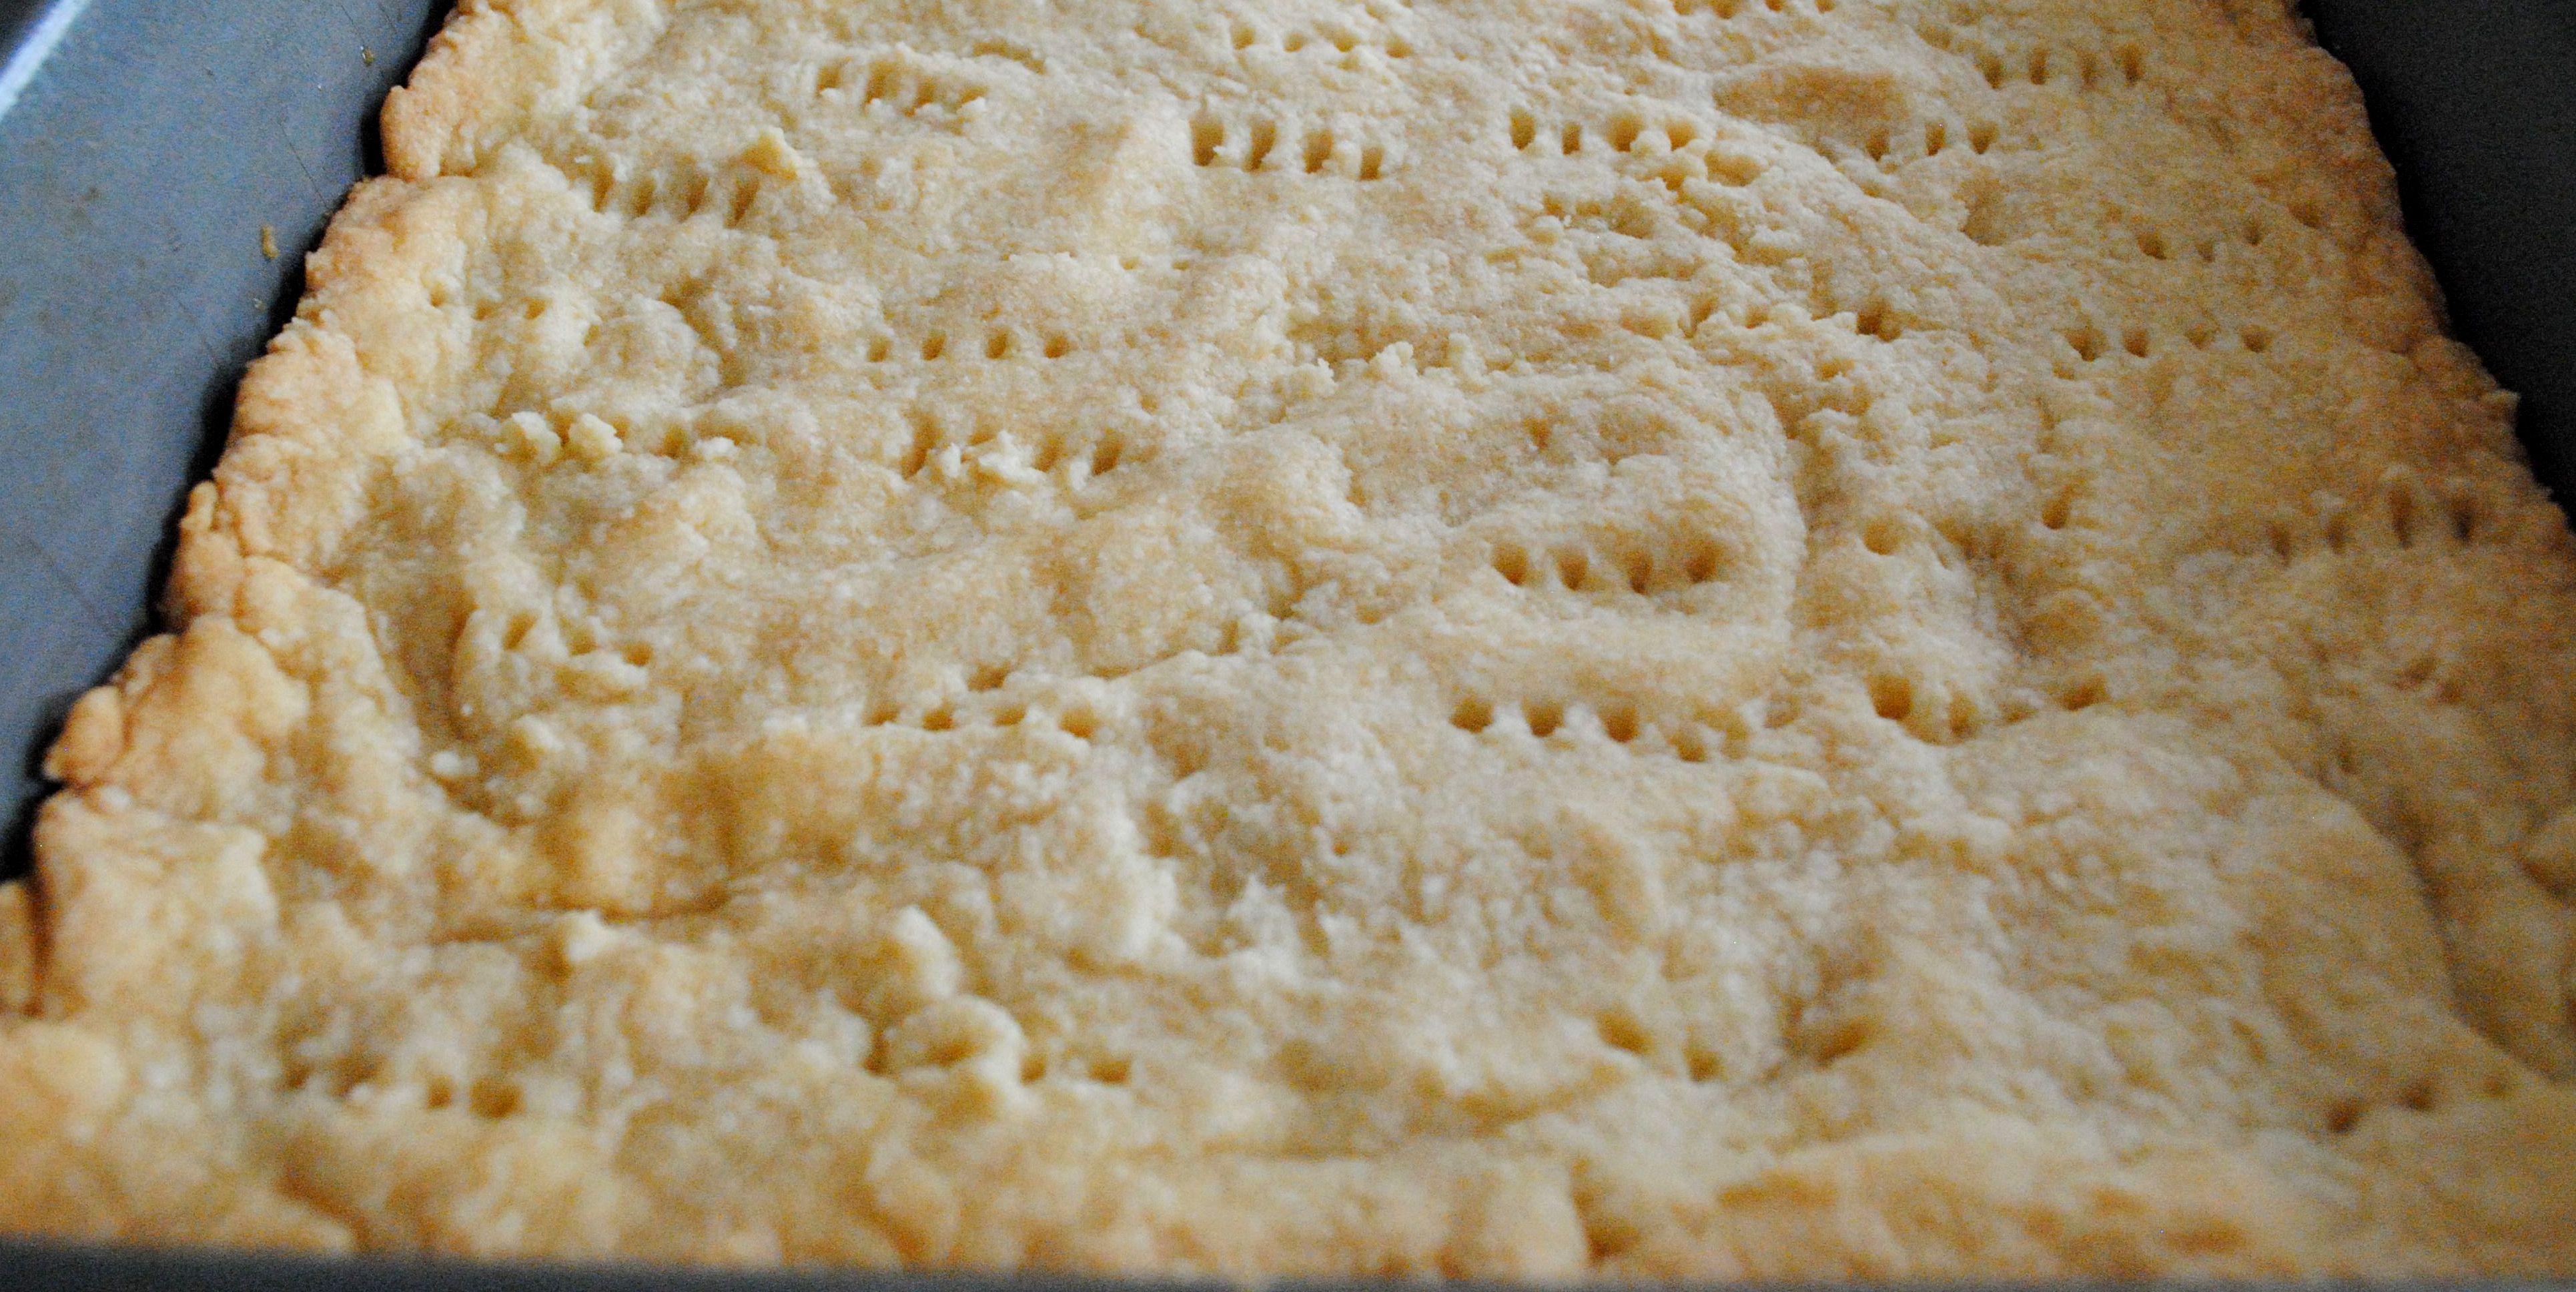
Step 1: The shortbread layer
I had never made shortbread before, but it didn’t seem to be terribly demanding. I just threw softened butter, powdered sugar, vanilla, and flour into my stand mixer and mixed until the dough came together. I patted out a thin layer in a greased 13″x9″ pan, pricked the surface with a fork to allow steam to escape, and baked for 45 minutes at 300°. Easy peasy, and the kitchen smelled like butter for the next couple of hours.
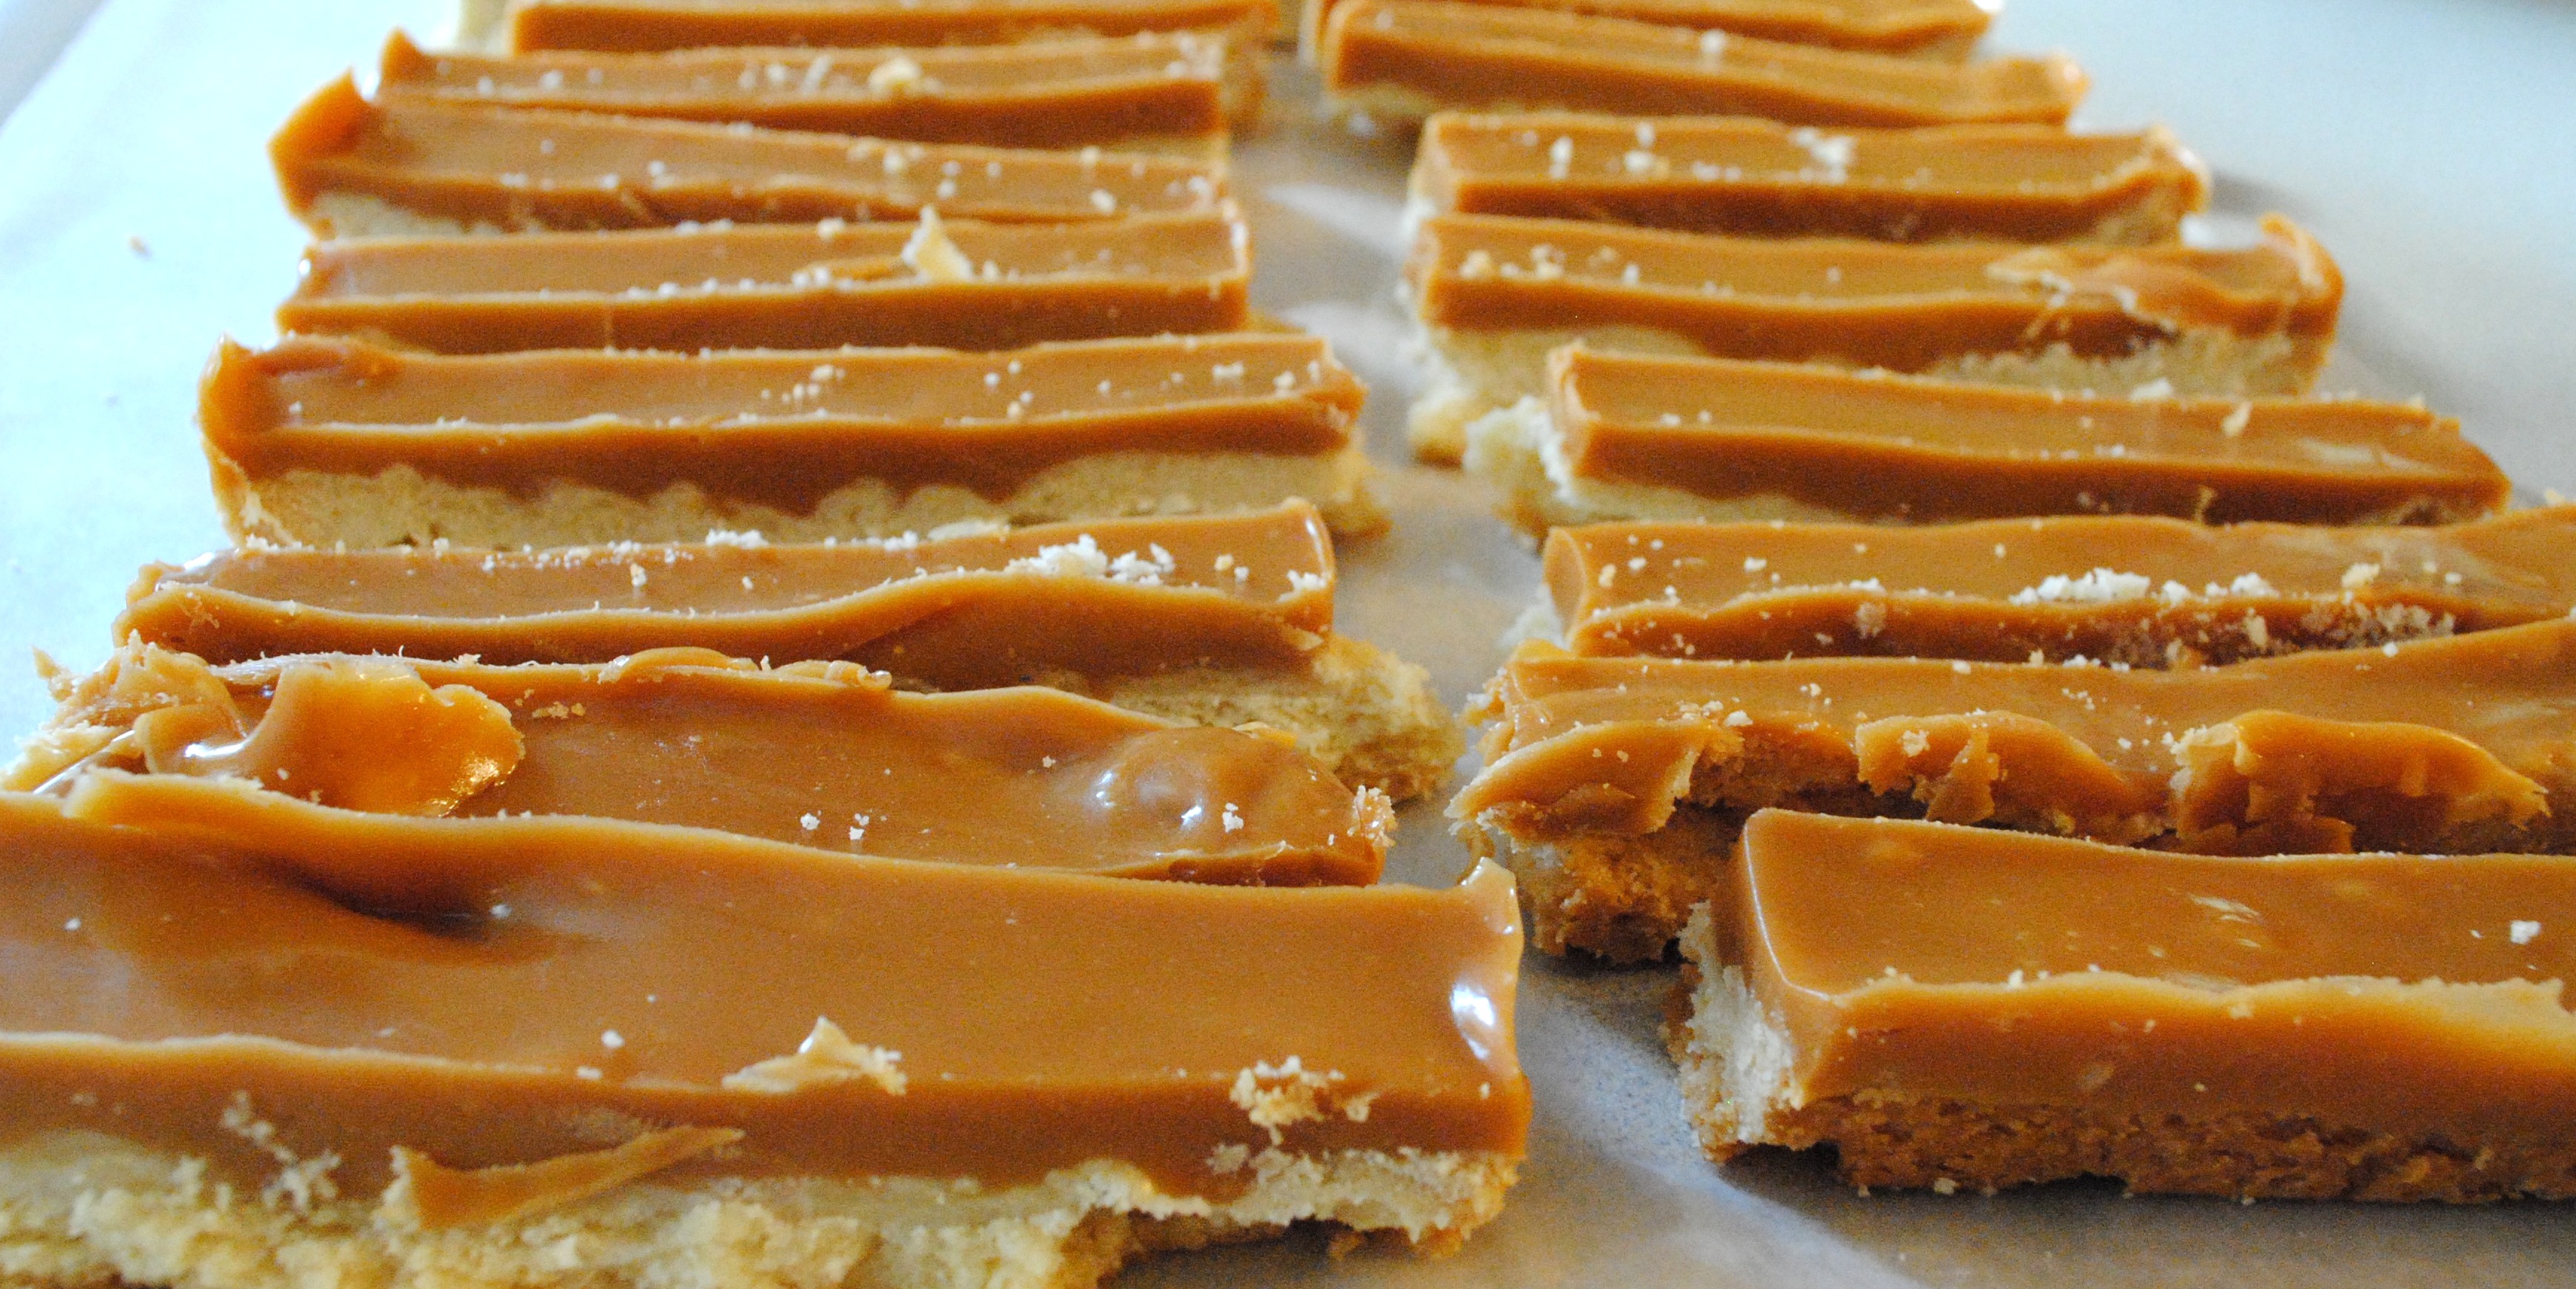
Step 2: The caramel layer
I briefly thought about making caramel from scratch, but then my lazy side got the better of me. Instead, I found unwrapped caramel bits that melted easily with some heavy cream, and then I poured the mixture smoothly over the cooled shortbread layer. Perhaps sticking my finger in the pot to lick up the extra wasn’t the smartest idea, but my thumb will heal eventually. The pan spent the night in the refrigerator so the layers would firm up, and after an hour or so at room temperature the next day, they were ready to be cut and dipped in chocolate.
Here’s where it got a little messy. You need a little oomph to cut through the caramel and shortbread layers, and the added force meant the bars didn’t break neatly along the cuts, so several bars lost big chunks of shortbread coming out of the pan. A delicious treat for the candymaker, but it doesn’t make the neatest looking bars.
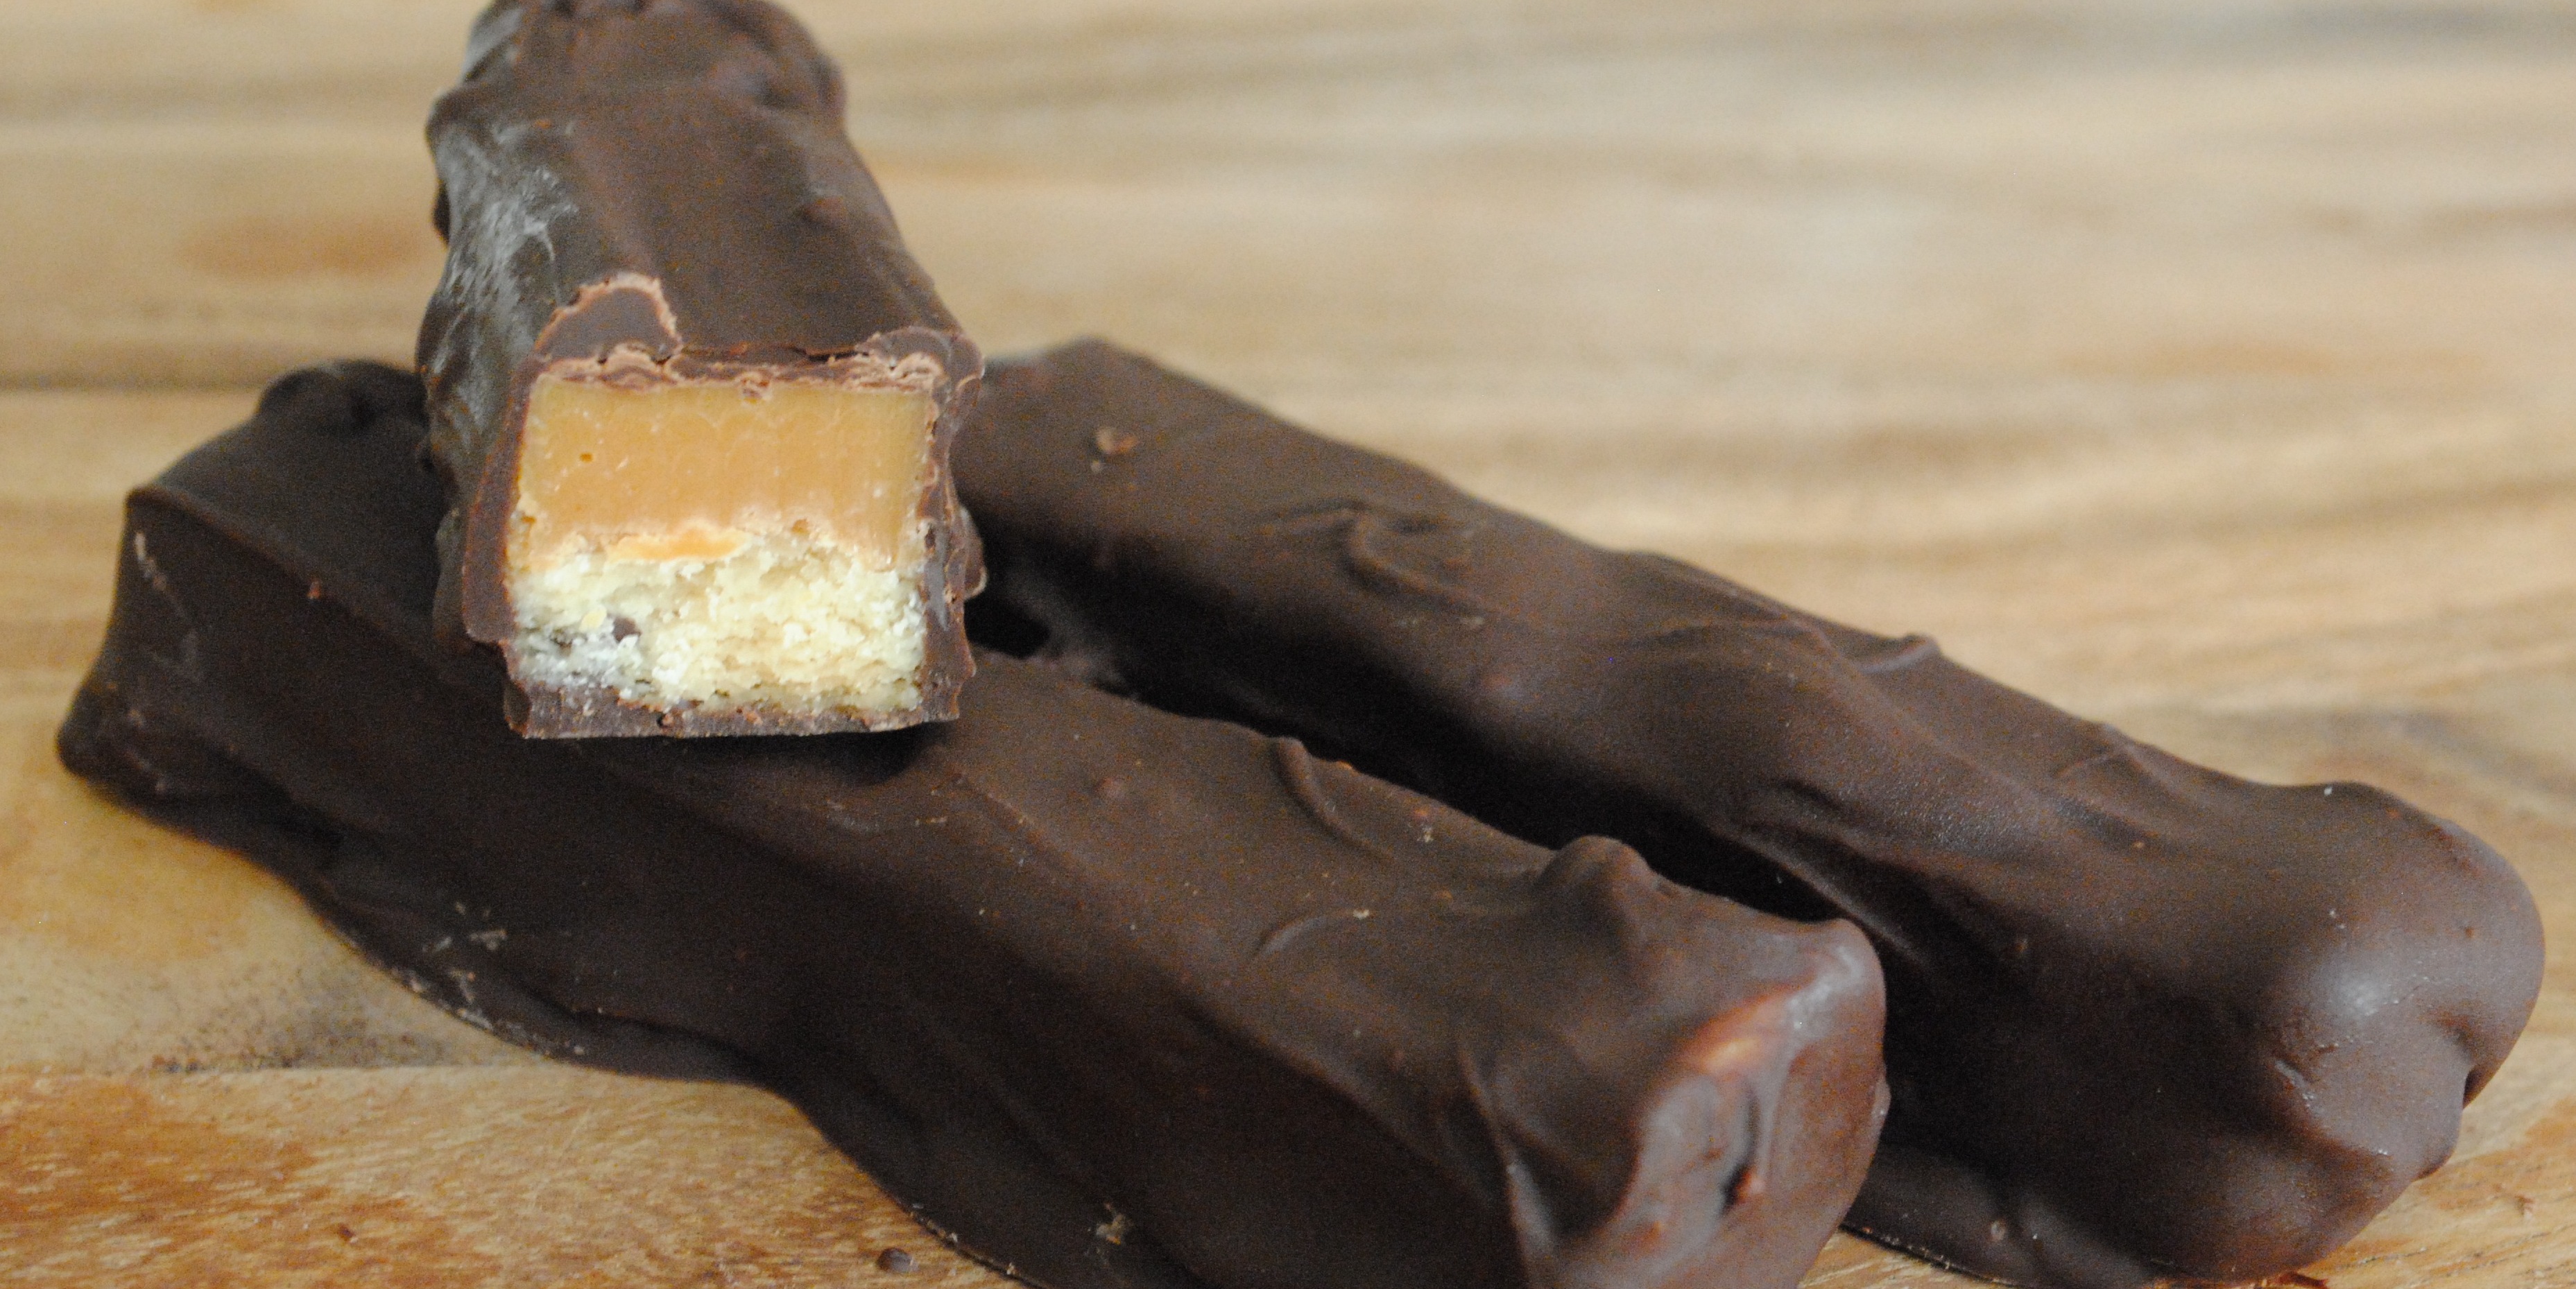
Step 3: The chocolate layer
And here’s where it got a lot messy — dipping the bars in melted chocolate. The original recipe gives you the option to merely melt the chocolate with a little vegetable shortening and pour it over the bars in the pan, which would be way easier but not particularly Twix-like in appearance. So I was determined to dip each bar entirely in chocolate and coat every crumb. But if you’re going to do that, you need more chocolate than the 18 ounces the recipe calls for. You also need to invent a way to do it without creating indentations from your fingers on the sides of the bars or burning your fingers in the hot chocolate.
After my first four or five bars, I gave up on completely immersing them in the chocolate and instead liberally coated the top of each bar. When I had enough chocolate left over after dipping the top of each bar, I awkwardly painted the jagged sides of the bars with the remaining chocolate. Not the easiest job when the chocolate is starting to cool and seize up, but I wasn’t going to let that chocolate go to waste. Another night in the fridge to firm up, and the candy bars were ready to consume.
The finished product
Caramel fans, you’re in luck. The sticky layer is much thicker than in the standard Twix bar, so the caramel flavor dominates each bite. But the shortbread cookie is delightfully light and crumbly, and if you use dark chocolate, the depth of cocoa flavor nicely balances the butteriness of the other two layers. The result is an extremely rich treat that satisfies the sweet tooth after just a few bites.
So is it worth the time and effort when you can buy a bag of Twix for $2 at Target? I can’t say I’ll make them regularly, and certainly never in the necessary quantity to feed a neighborhood of kids, but perhaps as a special birthday treat. (My 3-year-old has already requested them for his next birthday — in May.) And I can say that I’ve checked one recipe off my Pinterest list. Only 37 more to go.
Homemade Candy Bars
Yield: About 28 bars
Adapted from King Arthur Flour’s Thousand Dollars Bars recipe
For the shortbread:
1 c (2 sticks) room-temperature butter
1 c powdered sugar
2 tsp vanilla
2 c all-purpose flour
For the caramel:
18 oz caramel (I used Kraft’s Caramel Bits to avoiding unwrapping a million individually wrapped caramel squares)
3 tbsp heavy cream
For the chocolate:
20 oz milk or dark chocolate, melted (I used dark)
1 tbsp vegetable shortening
- Preheat oven to 300°F. Spray a 13″x9″x2″ pan with cooking spray.
- Beat the butter, powdered sugar, and vanilla in a medium bowl or in a stand mixer. Add in the flour gradually and beat at medium speed until it comes together to form a crumbly dough.
- Spread the dough in the pan using your fingers and prick liberally with a fork.
- Bake for 35-45 minutes until the shortbread is golden brown. Remove from oven and cool completely.
- Melt the caramel and heavy cream together over low heat in a small saucepan. Pour over the shortbread layer and chill in the refrigerator for at least 30 minutes. If you chill the pan for several hours or overnight, let the pan sit at room temperature for about an hour before cutting the bars.
- When the caramel layer is firm, cut down the length of the pan to split the pan into two narrow rectangles. Then cut across the width of the pan to make finger-like bars. Remove the bars from the pan onto sheet trays covered with wax paper.
- Melt the chocolate and shortening over low heat in a medium saucepan. Dip each bar into the chocolate and return to the wax paper. Chill in the refrigerator for several hours to let chocolate set.
We run into the chocolate-dipping problem at Christmas making Ritz-and-peanut-butter sandwiches coated in chocolate. Our solution is to just dip half in the double boiler, let it set and cool on wax paper, then dip the other half. It doesn’t look perfect, but no fingers are burned.
These look awesome and I am definitely gonna try making some.