

Tomato season is finally upon us, which means that Caprese salad season is in full swing, too. There’s something about that classic Italian combination of fresh mozzarella cheese, tomatoes, and basil that makes me smile. Although simple, it’s such a satisfying combination that I’ll eat it with a slice of rustic bread and be perfectly sated — no need for another course. So why did I have to complicate one of the world’s most basic dishes by deciding to make my own cheese?
I know numerous people who make their own cheese, and everything I’ve read has told me that it’s simple. Mozzarella, the typical “starter” cheese, is only supposed to take 30 minutes to make, and who doesn’t have a spare 30 minutes, right? The ingredient list is four items long: milk (preferably local and organic and not ultra-pasteurized), rennet, citric acid, and salt. I trust you can find milk and salt. The rennet and citric acid are a little trickier. I found both at Whole Foods — the rennet was near the butter in the dairy section, and the citric acid was located with the other nutritional supplements. I also purchased my milk at Whole Foods — locally sourced Cedar Summit Farm milk from New Prague. Using a recipe from Eat.Drink.Better., I was ready for cheese-making magic.
Attempt #1: Total Fail
I was a journalism major in college who managed to fulfill her seven required science credits by taking astronomy and a class called Normal Aspects of Hearing, in which I was pretty sure that I was the only person not majoring in communicative disorders. So it really shouldn’t be much of a surprise that Ms. Wizard here used the Celsius side of the candy thermometer instead of the Fahrenheit side while making mozzarella. What happens when you heat the milk to 105° Celsius? After two hours, you get a nasty, overcooked mess of curds that are damn hot to touch and impossible to shape into shiny balls of cheese. It goes without saying that a lot of swearing takes place as well.
Attempt #2: Success?
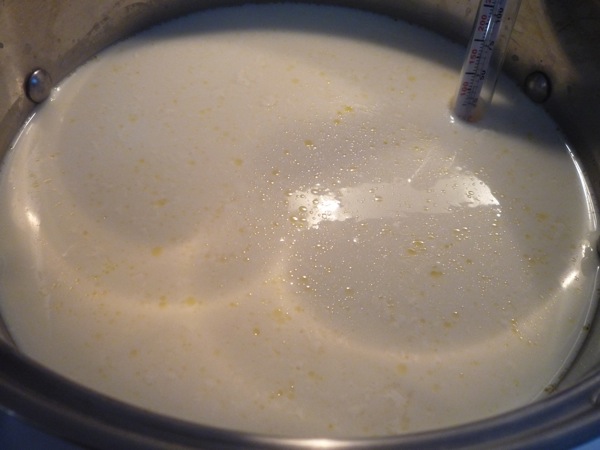
Armed with a new candy thermometer and a renewed sense of determination, I set out to remedy my mistakes. I poured one gallon of whole milk into a large stainless steel stockpot, hitched the thermometer to the side, and turned the heat on medium-low. Once the milk reached 55° Fahrenheit, I added 1½ tsp of citric acid to ¼ c cold water and gently stirred the mixture into the milk. So far, so good.
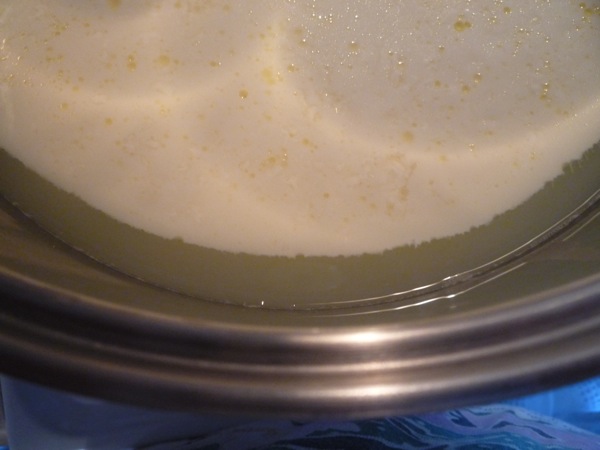
When the milk hit 88°, I mixed ¼ tsp of rennet into another ¼ c cold water and added it to the pot. I turned the heat up to medium and watched the mercury on the candy thermometer rise to 105º. Within a few minutes, I saw curds start to form and the milk solids began to separate from the side of the pot, just as the recipe said. Woo-hoo, I rock!
Now it’s time for the messy part. Using a slotted spoon, I scooped the hot curd from the pot into a large glass bowl. Along with the curd came much of the milky whey from the pot, so I spent the next 10 minutes or so scooping up balls of curd from the bowl and squeezing the whey out into a smaller bowl. I first wore rubber gloves while squeezing, but I found the bulky things to be too much of a hassle, so once the curds had cooled slightly I squeezed with my bare hands and didn’t burn myself. Another advantage to reading the correct side of the thermometer!
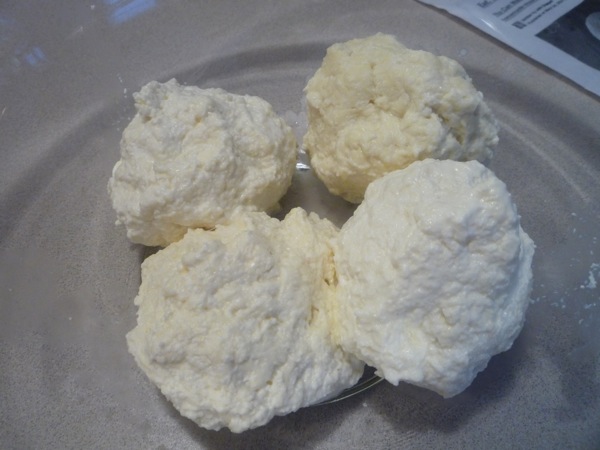
After squeezing and squeezing and squeezing (you should definitely eat your Wheaties that day if you attempt to make cheese), I finally had four small balls of curd ready to be nuked and kneaded. I put the balls in the microwave for 30 seconds and then tried to knead each one like I would with bread dough, as the recipe suggested, but I found it hard to work the small balls of curd in the same manner as a large hunk of dough. So instead I mushed each ball around in my hand, squeezing out additional whey as necessary. After kneading each ball for about two minutes, I put them in the microwave and started the whole process over again, adding salt to the curd after the second nuking.
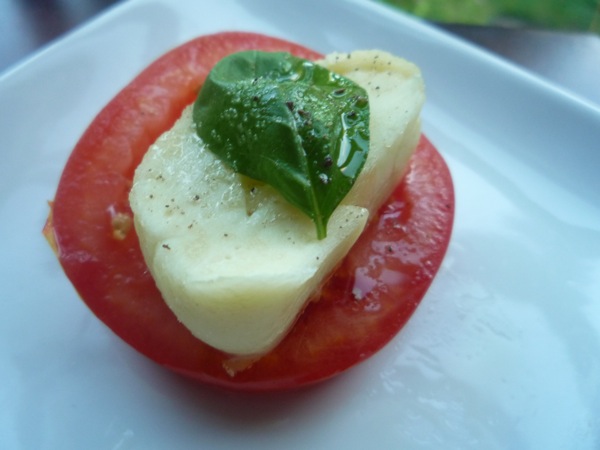
You’re supposed to keep nuking and kneading until the cheese “has a slightly glossy sheen to it and can be pulled like taffy.” This is where I think I went wrong. I did four cycles in the microwave, and I think only three were necessary because while I got the shiny and taffy-like cheese, it had very little moisture left in it and was slightly rubbery. Pulling the cheese into strands also prevented the balls from looking even-textured, and it didn’t look fresh — it looked overcooked. Still, it had an unmistakable mozzarella flavor that was enhanced with a slice of tomato, basil, fruity olive oil, salt, and pepper.
While attempt #2 wasn’t a complete disaster, I can’t really call it a success, either. Perhaps attempt #3 will be the lucky one, but I’m not about to undertake it. There are so many sources of delicious fresh mozzarella here in town, and local, organic milk can cost up to $8 / gallon, so financially, making your own cheese doesn’t make much sense. If you’ve got the time and loads of patience, though, go for it. But from now on, you’ll find me getting my mozz on at a local cheese shop.
Homemade Mozzarella
Recipe from Eat.Drink.Better.
1 gal milk, either raw or pasteurized but not ultra-pasteurized
1½ tsp citric acid dissolved in ¼ c cold water
¼ tsp liquid rennet dissolved in ¼ c cold water
Flaked salt
- Pour the milk in a large stockpot and bring to 55° over medium-low heat.
- Add the citric acid and stir gently.
- Watch carefully for the milk to reach 88° and then add the rennet, stirring gently for about 30 seconds.
- Increase the heat to medium and bring the milk to 105°.
- Keep the milk at this temperature for five minutes or until curds begin to form and separate from the side of the pot. The whey should be almost clear; if it’s white, allow to heat longer.
- Using a slotted spoon, scoop out the curds into a large bowl.
- Grab a handful of curds and squeeze as much whey as you can into another bowl. Repeat until no curds remain and you have several small balls of whey-depleted curd.
- Place the cheese balls in the microwave for 30 seconds and then knead each one between your fingers, squeezing out whey as necessary.
- Repeat this step several times, adding salt after the second nuking. When the cheese is slightly glossy and can be pulled like taffy, you’re done!
Is there any more traditional alternative to microwaving and also for the citric acid? vinegar? I’m allergic to citric acid, and like to avoid nuking….thanks
I believe you could also dip the balls in a bot of boiling water for a few seconds. This recipe didn’t give that option, but other recipes you can find online do. I’ve also seen recipes that use freshly squeezed lemon juice rather than the citric acid.
We found we got more consistent results using powdered milk & we found that pulling too much actually gave us drier cheese.
Well, now you know. Props for attempting to make it!
Sounds like a fun science project for when the boy(s) get older, but for now I’ll stick to buying it from the pros, too! Kudos for undertaking, and documenting, the endeavor.
I highly recommend the Cedar Summit milk and cream to anyone looking for a fresh local “old fashioned” source of diary. Their cream makes the best ice cream in a Cuisinart countertop spinner! Unbelievably smooth.
Thanks. I’ve always wondered if this was doable or worth it. Sounds like I’ll keep getting my fresh mozz at Seward Co-op!
Thanks a ton for the brilliant recipe!
Is that all it makes? Would you say a gallon of milk= one 10″ pizza’s worth?
I’m becoming more and more lactose intolerant as I become older. I do not want to give up the pleasures of cheese and will attempt to make it with lactose free whole milk. But, it is ultrapasturized. You mentioned that should be avoided. Why?
Stu – Ultra-pasteurized milk doesn’t have the bacteria and cultures needed to form the curd, so you’ll need to use raw or regularly pasteurized milk.
I think the curd is formed by the Rennet, not by bacteria. If bacteria did the job then the curds would not form for days. Maye the bacteria cultures are what add the flavor along with the acids and good quality milk.
Big Tip: Use raw milk. It separates so quickly, it’s almost as if it wants to be mozzarella.
If you’ve ever had raw milk in the past, you’ll know that one of the perks is the cream that rises to the top of the bottle. Scoop that out! Cream does not turn into mozzarella.
I happen to be in a wonderful place, where I can get my free-ranged, short-horn devon raw milk for $3 a 1/2 gallon (if’n I bring back the bottle, which costs $2).
Price Breakout:
$6 of milk makes two cups of cream, 3 big balls of mozzarella and a whole lotta whey.
Two cups of cream makes one cup of butter (two sticks!) and one cup of buttermilk. Yum.
3 cups of whey can be boiled down again to make half a cup of ricotta.
So you end up with plenty of mozzarella (or, my favorite, boccancini), a few yummy spoonfuls of ricotta, two sticks of butter and a good helping of buttermilk. for $6.
: )
artsy – Italians boil water (or use the hot whey) and constantly dip and kneed and dip and kneed until a good consistency. No microwave, but very, very hot. This is how I started making boccancini – it’s just more fun.
josh – one gallon of milk creates more cheese than necessary for a pizza. but that’s just me. maybe you like to drown in cheese. : )
FYI: Regular rennet is traditionally spoiled milk taken from a calf’s stomach.